
Living in a remote bush town on the Cape York Peninsula changes your perspective on distance. Here, the journey to the nearest regional hub is a massive 1,000-kilometre trek. The asphalt doesn’t stretch the whole way. Approximately 500 kilometres of this route is sealed, while the other 500 kilometres consists of challenging dirt tracks. The infrastructure is unpredictable. One section features 400 kilometres of continuous bitumen, but the remaining 600 kilometres is a patchwork of dirt and bitumen. Nature dictates travel up here. For six months of the year, the road is bone-dry and dusty. The other six months bring the wet season—a period of intense flooding and deep bog holes that render the road mostly impassable. During this wet season, tourist, freight, and local traffic drops off completely as the region isolates itself.
“I hope this article can share info on how to prepare for off-road trips as well as being safe when driving on unsealed roads”
This article focuses strictly on dry-season travel. Driving this route in one go takes around 15 hours of intense, focused concentration. To complete this trip safely, you cannot rely on luck. I use a strict logical framework to break my preparation for this drive into ten distinct focus areas.
Trip Planning.

- Before your tyres even touch the dirt, you need accurate intelligence. Out here, digital maps cannot tell you if a grader has been through or if a creek bed has washed out.
- Gather real-time data: Check official government road reports online before departure.
- Use word of mouth: Talk to truck drivers, cattle station owners, or locals who just drove the track.
- Note local closures: Assume outback roadhouses or station fuel pumps might be closed, and plan your stops with backup options in mind.
Communication.
When you leave the bitumen in remote Australia, the mobile phone signal vanishes completely between small towns and roadhouses. If you run into trouble, you are entirely on your own unless you bring your own communications network. Here are the 2 comms options I use.

       [Starlink Satellite]
             /       \
            /         \
 [Standard Dish]   [1kVA Inverter] --> 12V DC to 240V AC
        |
 (Plonked in Ute Tray)
The Mobile Starlink Setup. To maintain full connectivity, I permanently installed a 1 kVA inverter in my ute. This inverter converts the vehicle’s 12V DC battery power into 240V AC power.In Australia, you will encounter two types of Starlink hardware:
- Starlink Mini: Small, energy-efficient, and designed specifically to be roof-mounted on a moving vehicle. The downside is that the Mini data plans generally cost more due to the specialised hardware and mounting flexibility.
- Starlink Standard: A larger dish meant for residential or stationary use, not designed for vehicle mounting.
To save money on hardware and subscription fees, I use the Standard dish. My method is simple: I plonk the Standard dish securely into a sturdy plastic box right in my ute tray and plug it into my inverter. It works perfectly throughout the trip and provides seamless access to YouTube, podcasts, messaging, and entertainment. As long as the dish can see a relatively clear sky, you will get a signal!
UHF Radio
I also installed a hardwired 12V UHF (Ultra High Frequency) radio into the dash. UHF radios operate on line-of-sight radio waves. This means their signals travel in a straight line, bouncing between your vehicle’s antenna and the horizon or nearby landscape features. While they cannot transmit across thousands of kilometres like satellite gear, they are vital for short-range communication. You use them to speak directly with oncoming road trains, heavy freight trucks, and nearby travellers to coordinate safe passing maneuvers in heavy dust, talk about road conditions and hazards, or to have a yarn with other travellers.
Check-In Protocols
- Share your itinerary: Always tell someone your exact start time, finish time, and estimated time of arrival (ETA) at specific landmarks.
- Send updates: Use pockets of phone signal, UHF repeaters, or your Starlink setup to update your contact person on your current position.
- Reset your trip meter: reset your trip meter to zero between every single bush town or local landmark. If something goes wrong, you can look at your dashboard and radio out your exact kilometre location relative to the last town.
Mechanical & Mobility.

Your vehicle is your mechanical life-support system in the bush. If it fails due to poor maintenance, you are instantly stranded in a harsh environment. Here are the mechanical prep issues I check personally before heading off.
Under bonnet and underside inspection before the trip
Check every single drive belt tension and wear indicators to ensure nothing snaps under load. Inspect all fluid levels thoroughly:
- Engine oil and coolant
- Power steering and clutch fluid
- Brake fluid
- Gearbox oil
- Front and rear differentials
- Transfer case fluids
Pump every grease point on your suspension and driveshafts. Conduct a rigorous visual inspection of the engine bay and the vehicle’s underside, looking for loose bolts, weeping seals, or cracked brackets. If anything looks even slightly suspect, engage a professional mechanic to fix it before you depart, if you are unable to fix it yourself
Pro tip: Place all the things you will want quick access to in arm’s reach of the driver’s seat so you can easily reach over and grab them if you are driving alone at day or night without any trouble at all, e.g. headlamp/torch, snacks, food, water, tea/coffee flask, etc.
Fuel and Load Management.

Never totally rely on remote cattle stations or tiny bush communities for fuel; they may be closed or out of stock when you arrive. I carry five 20-litre jerry cans of diesel (100 litres extra) securely tied down in the tray.
Pro-Tip: Stack your jerry cans as close to your vehicle’s fuel filler cap as possible. Use a simple siphon hose to manually transfer the fuel when needed. This method lets you top up your tank on the side of the road without untying a mountain of gear from your tray.
Always balance your cargo evenly over the two rear wheels. When you load a vehicle heavily to one side, you create unnecessary uneven weight on one side of your vehicle. As your vehicle gets hammered by miles of harsh corrugations, that added downward stress can potentially destroy your wheel bearings, shock absorbers, or suspension components. Finally, ensure your tyres are inflated to the correct pressure for dirt roads to prevent punctures, and always carry at least one functional spare wheel—though two spares are my personal preference. Ensure your vehicle has a quality 4WD snorkel fitted to protect the engine intake from heavy dust and deep water if you encounter unexpected river crossings.
Tools and Spares.

You must be self-sufficient enough to handle common trackside breakdowns. Your recovery kit should always include:
A comprehensive mechanical tool kit featuring a full set of sockets and spanners.
An off-road jack rated for your vehicle’s fully loaded weight, along with a stable base plate and tyre-changing tools.
A tyre plug kit and a reliable 12V air compressor to fix punctures and reinflate tyres

A heavy-duty snatch strap accompanied by two large, load-rated shackles.
A pair of high-quality recovery boards and a shovel to dig yourself out of soft sand or mud.
Essential spare parts: a replacement fan belt, alternator belt, power steering belt, radiator hoses, and heavy-duty hose clamps.
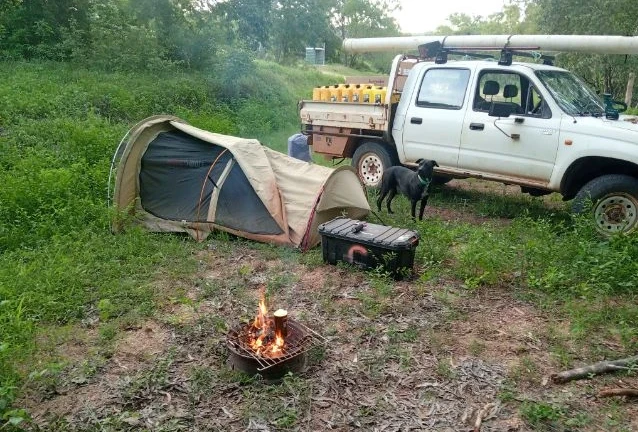
Fire, Water, Shelter, and Food.
If your vehicle suffers a catastrophic failure or you simply want to pull over for a rest, your focus shifts instantly from mobility to basic human survival.
Survival Priorities
🔥 Fire    --> Lighter & matches in the glovebox
💧 Water   --> 20L fresh water jerry can minimum
⛺ Shelter --> Swag, tent, or tarp with bug protection
🍏 Food    --> Non-perishable items, fresh fruit, tea/coffee
Fire: Always carry a reliable lighter and waterproof matches in your glove box. A fire can signal for help, maintain warmth, cook food and boil water, etc.
Water: Carry a minimum of one 20-litre jerry can filled purely with clean, fresh drinking water. This is separate from your vehicle’s cooling water.
Shelter: Pack a durable swag, a tent, or a heavy-duty tarp with plenty of ropes. Include a sleeping bag, pillow, and a high-quality mosquito net. Pack a battery-powered fan to keep air moving during stifling nights, alongside a bright torch or headlamp
Food: Pack plenty of non-perishable food items and portable cooking gear, such as a compact military-style army dixie set. If you are travelling with a pet, ensure you pack extra pet food. Avoid eating greasy, fatty junk food on long drives; it induces fatigue. One thing I’ve realised doing numerous bush miles is that it is easy to fall into the junk food,eat-whatever- trap on the road. I soon worked out that rubbish food =lethargy, fatigue, etc., during travel. Be sensible and stick to fresh fruit, bottled water, a flask of hot tea or coffee and good food to keep your energy levels stable and your mind alert over the long miles. The other thing also is to try to eat at the normal times that you would eat when you aren’t travelling, e.g. your normal routine.
Safety.
Fatigue is a major hazard on a 15-hour outback drive. You must respect your natural sleep patterns. Avoid driving deep into the night when your body naturally wants to shut down. If you feel your eyelids getting heavy, pull over immediately, where safe to do so and rest.
Drive strictly to the conditions of the track. If the road is severely corrugated or potholed, drop your speed. Your vehicle is a mechanical object; treat it carelessly, and the corrugated roads will, in turn, repay you with a mechanical failure of some sort.
Always carry an appropriate first aid kit in your vehicle as well.
Compassion.
The unspoken law of the outback is simple: look out for one another. Always maintain compassion for your fellow travellers. If you see someone stranded or broken down on the side of the track, stop and assist them if it is safe to do so. Put yourself in their shoes and think about what you would appreciate if you were stuck in the middle of nowhere. You can offer help in several practical ways:
- Offer them a lift to the next town if their vehicle is completely disabled.
- Lend your tools or mechanical skills to help them fix the issue.
- Use your Starlink or UHF comms to send out a message for professional recovery assistance.
- Even if you cannot fix their problem, simply stopping to ask “Are you OK? Do you need food or water?” provides immense mental relief to a stranded driver.
Conclusion.
I use this checklist before every single trip to ensure I return home safely from any remote trip. Unsealed outback roads are beautiful, but they are incredibly isolated, rough, and unforgiving. By breaking your preparation down into logical categories—from communication systems to load balancing—you can explore these remote routes with confidence. Stay safe on the dirt, drive to the conditions, and look after each other out there on the tracks.